Table of Contents
Setting up WordPress on Kelma is quick and easy! This guide will walk you through the simple steps to get your site up and running in no time.
Step 1: Access Your Site on the Kelma Dashboard
- Log in to your Kelma dashboard.
- Navigate to the Sites section.
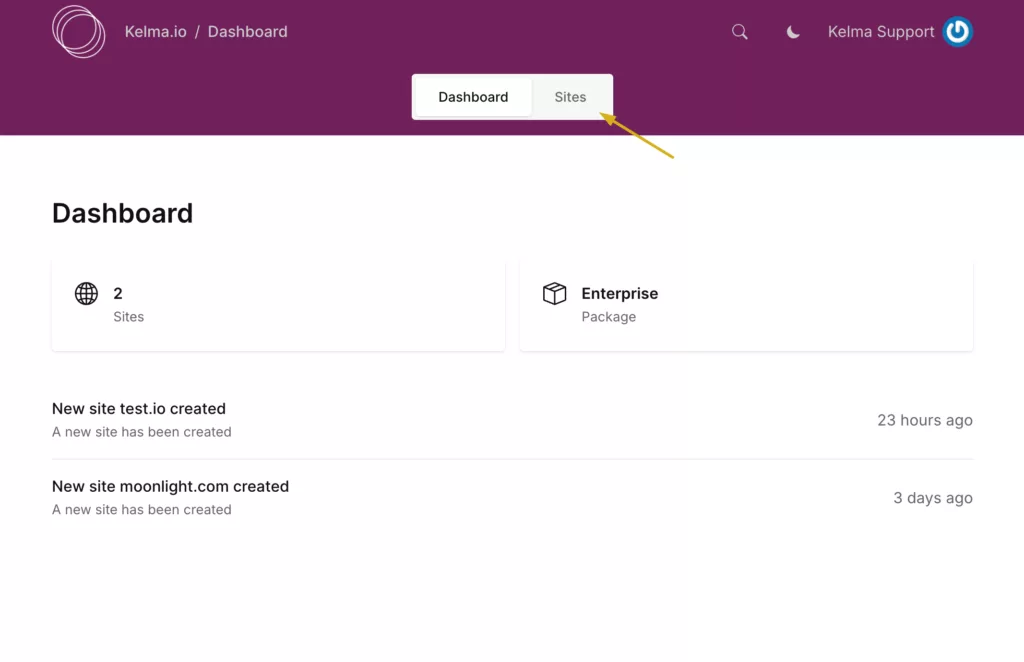
- Select your newly created site from the list.
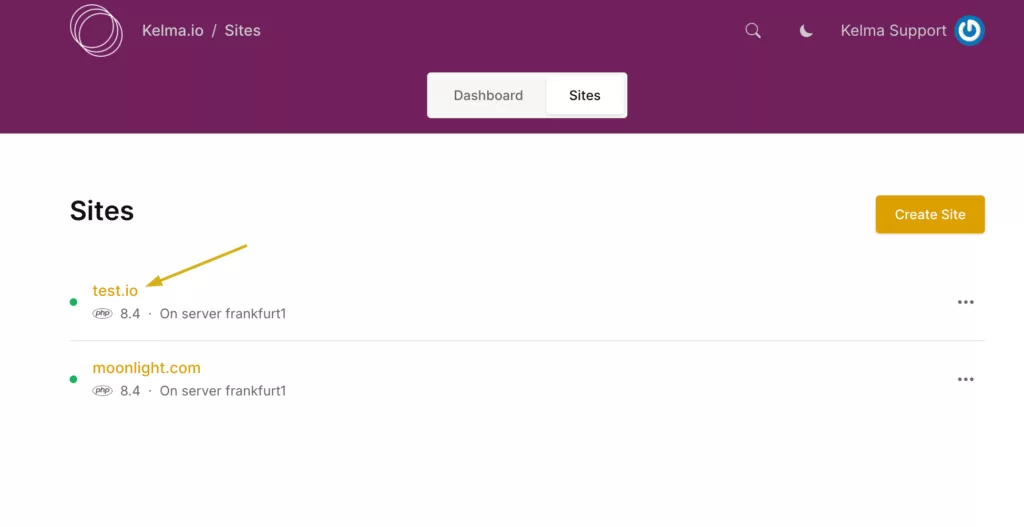
Step 2: Navigate to the Apps Tab
- Once inside your site’s management panel, find and click on the Apps tab.
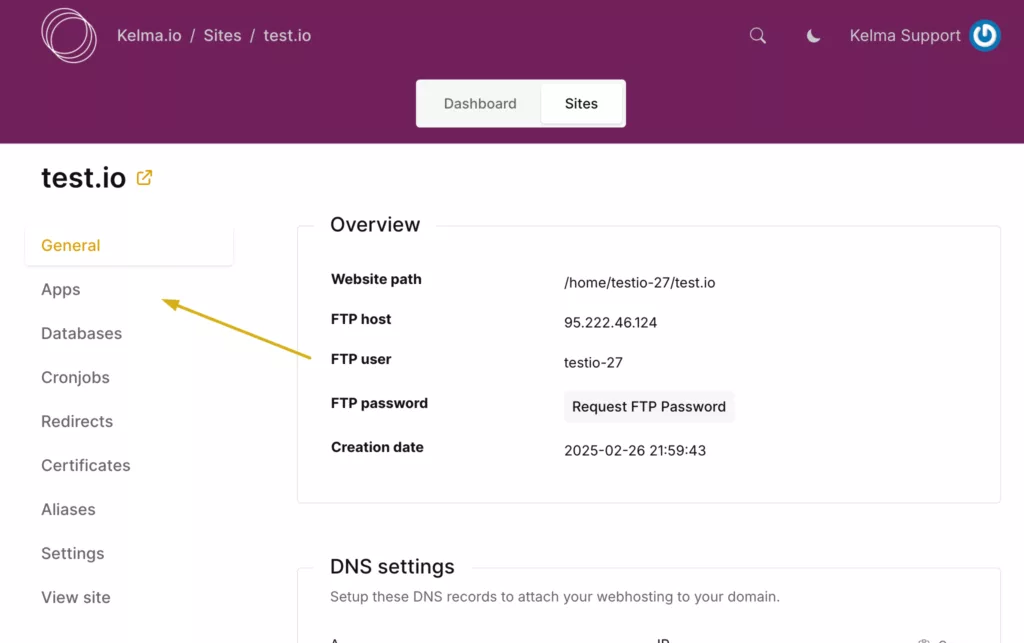
Step 3: Install WordPress
- Locate the Install WordPress option and click on it.
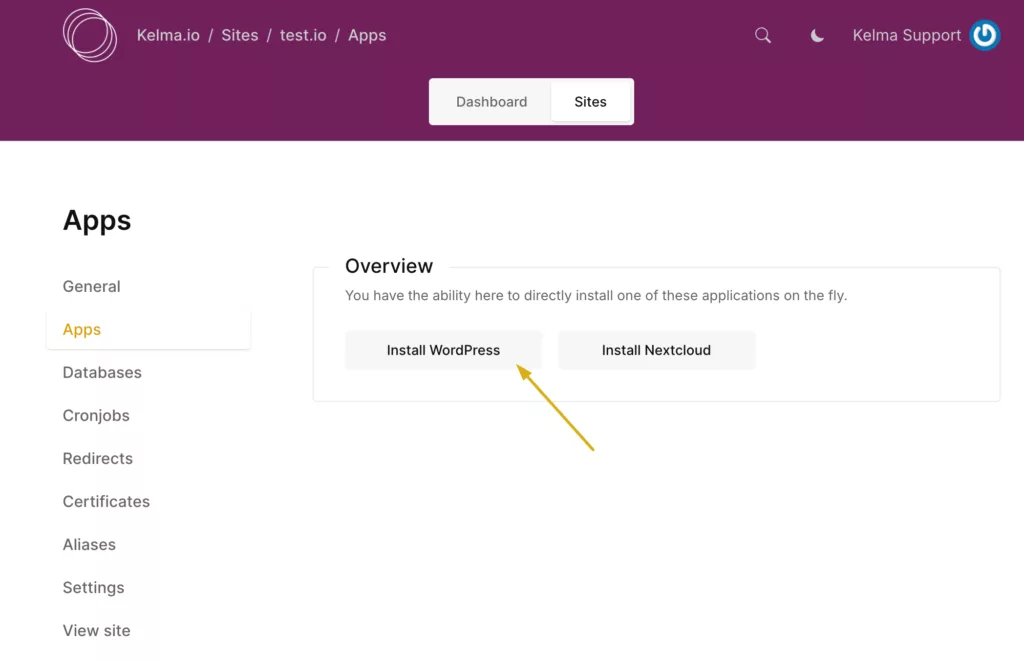
- (Optional) Check the box to automatically create a database and attach it to your WordPress site.
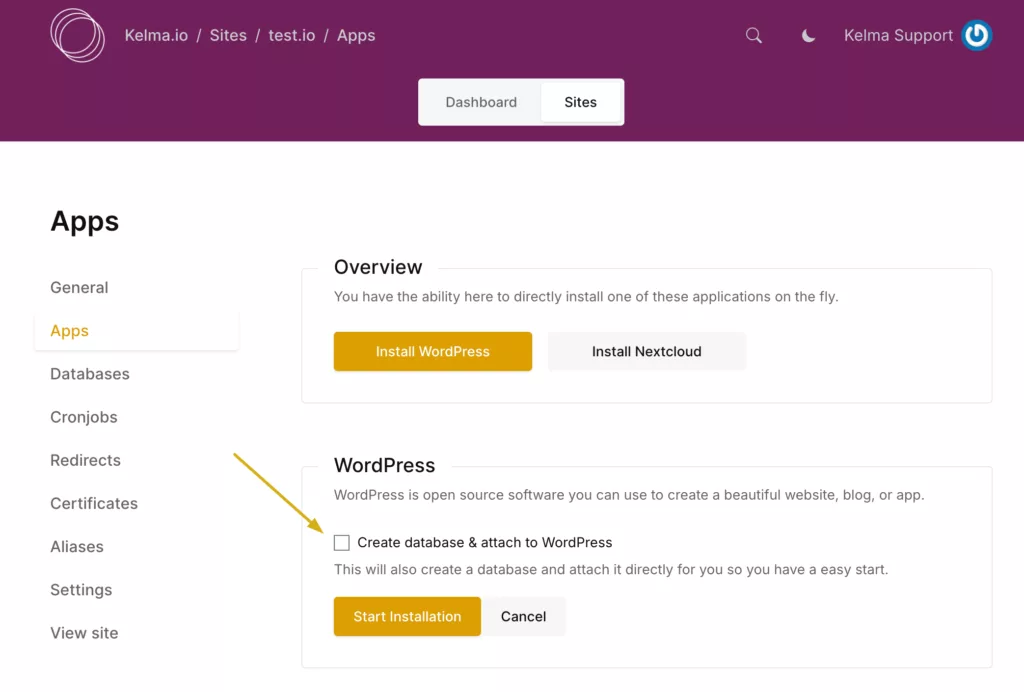
- Click Start Installation to begin the process.
Step 4: Wait for Installation
- The installation process will take a few minutes.
- Once complete, you will receive a confirmation message.
- You can now access your WordPress site and start customizing it.
Additional Notes
- Ensure your domain is properly set up before installing WordPress.
- If you encounter any issues, check our knowledge base or contact our support team.
- After installation, log in to your WordPress admin panel using the provided credentials to configure your site.
By following these steps, you will successfully install WordPress on your Kelma-hosted site and be ready to start building your website. Setting up WordPress on Kelma is quick and easy!
Leave a Reply